Description
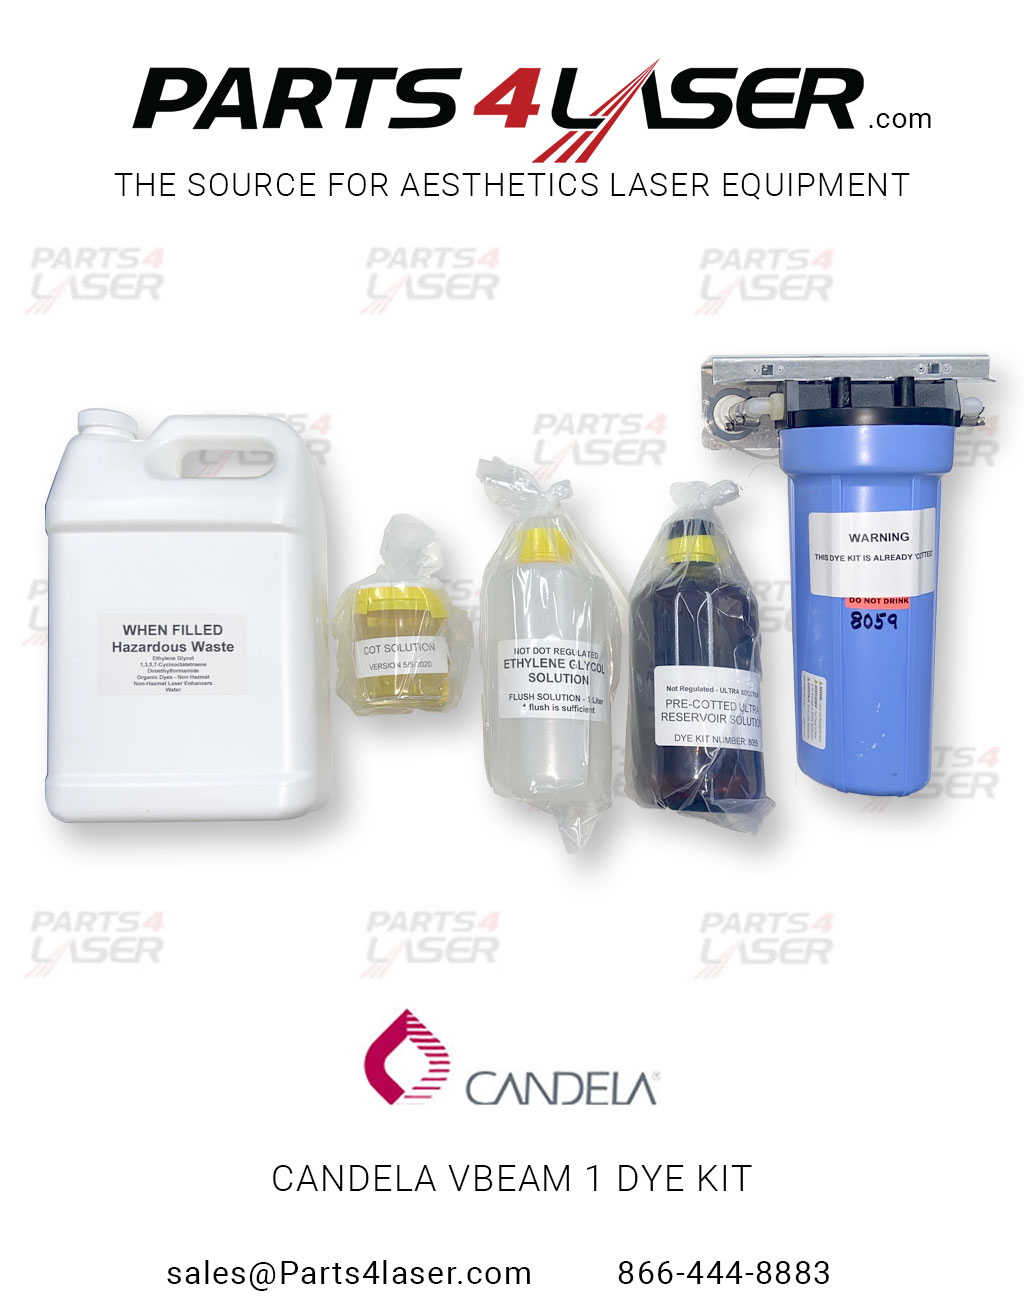
This is a premium quality Dye Kit for Candela Vbeam 1 machines.
CACN3311
This package contains 1 dye kit package.
You can get up to 50,000 to 100,000 pulses from this kit.
This Dye Kit will work on the following Candela machines:
- Vbeam 1
SHIPPING THIS ITEM WILL COST MORE THEN $90 BECAUSE ITS HAZARDOUS MATERIAL
Pre-Coated Dye Kits (Coated for you by Parts4laser LLP)
Original Vbeam (VB1)
Remove the old dye cartridge and connect the dye line fittings directly together. Disconnect the old COT bottle and run the COT pump for 99 seconds to expel all the old COT from the lines and pump bellows (older versions of COT may not be compatible with this kit). Install the new COT bottle and run the COT pump for 20 seconds to prime the bellows and the line to the reservoir. Sometimes this step may take an additional 5 seconds. With the dye pump running, open the dye stopcock and drain out as much of the dye fluid as possible. Turn off the dye pump (you can unplug the dye pump or turn off the laser). Remove the dye reservoir bottle and empty the contents into the waste bucket. Fill the reservoir with the Solvent Flush Solution. Turn the laser on again and let this fluid circulate for a few minutes and then drain again through the dye stopcock. Let the pump run until dye stops emanating from the drain. The less Flush Solution left behind, the better.
Stop the dye pump and empty the dye reservoir. Fill the due reservoir with the Pre-Coated Ultra Reservoir Solution. You must add all this solution to the reservoir. Turn the laser on (do not install the dye cartridge yet) and let it run until all the bubbles are gone and the laser has reached ~59 C. Unplug the dye pump (or turn off the laser) and install the new cartridge. Make sure the serial number of the cartridge matches the serial number noted on the Pre-Coated Ultra Reservoir Solution bottle.
Restart the dye pump (or turn the on laser) to circulate the dye through the cartridge. You will need to cycle the dye pump on and off in order to remove the bubbles. The only way to be sure about the bubbles is by observing the dye output at the laser head. You should allow the laser to run for 15 minutes and reach ~59 C before you begin calibrations. At the start of a user calibration, it is occasionally that the laser will inject some additional COT to bring the wavelength into range. Store the ‘Coating’ documentation you received with the laser.
Non Pre-Coated Dye Kits
Original Vbeam (VB1)
Remove the old dye cartridge and connect the dye line fittings directly together. Disconnect the old COT bottle and run the COT pump for 99 seconds to expel all the old COT from the lines and pump bellows. Install the new COT bottle and run the COT pump for 20 seconds to prime the bellows and the lines. Sometimes this step may take an additional ~5 seconds. With the dye pump running, open the dye stopcock and drain out as much of the dye fluid as possible. Turn off the dye pump (you may unplug the dye pump or turn off the laser). Remove the dye reservoir bottle and empty the contents into the waste bucket. Fill the reservoir with the Solvent Flush Solution. Turn the laser on again and let this fluid circulate for a few minutes and then drain through the dye stopcock. Let the pump run until dye stops emanating from the drain. The less Flush Solution left behind, the better. Stop the dye pump and empty the dye reservoir. Fill the dye reservoir with the Non-Coated Ultra Reservoir Solution. You must add all this solution to the reservoir. Turn the laser on (do not install the dye cartridge yet) and let it run
until all the bubbles are gone. Unplug the dye pump (or turn off the laser) and install the new cartridge. Restart the dye pump (or turn the on laser) to circulate the dye through the cartridge. You will need to cycle the dye pump on and off in order to remove the bubbles. The only way to be sure about bubbles is by observing the dye output at the laser head. You should allow the laser to run for 15 minutes and reach 59C before you begin ‘Coating’. You can begin the usual ‘Coating’ procedure. Follow the energy settings and COT injections suggested by the ‘Coating’ paperwork included with the kit. Failure to record this information will void the warranty. Inject no more COT than 20 seconds at a time with 2-3 minutes between injections. Most kits require about 60 to 70 seconds of COT. You should perform energy and wavelength calibrations after you finish ‘Coating’ and before you perform a user calibration.
At the start of a user calibration, it is occasional that the laser will inject some additional COT to bring the wavelength into range. Store the ‘Coating’ documentation you received with the laser.
Call with any questions or installation problems at once to:
U.S Toll-Free: 866-444-8883 * Office: 201-588-9858 * Sales: 201-448-7788